


Written by: Zak Shah, 3rd Year Medical Student, UCL.
IV Access – the dread of all students!
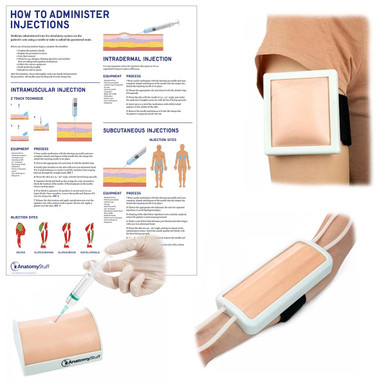
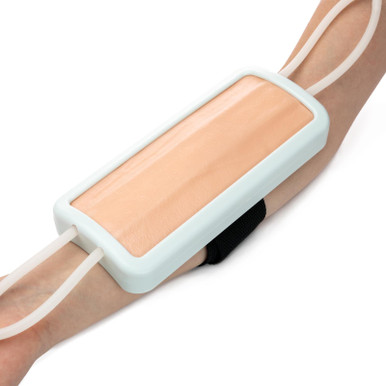
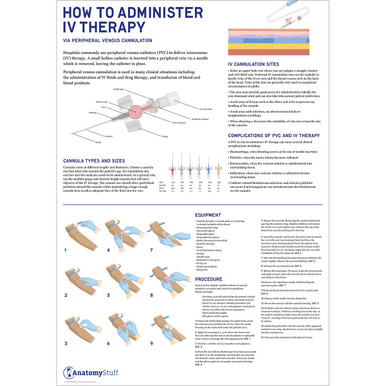
Gaining IV access is an essential skill for healthcare staff and students, but it can be difficult and frustrating, especially when it is difficult to locate a vein. We have a range of resources to help you practice IV Access, from IV training arm models to illustrated posters which explain IV cannulation step by step.
Step One:
Begin by washing your hands, introducing yourself and gaining the patient’s consent—Don your gloves and apron.
Step Two:
Before you prepare your sterile field, ask the patient to hang their arm slightly over the bed, allowing the blood to pool while you prepare your sterile field. This helps to make veins become more prominent.
Step Three:
Prepare your sterile field. You will need:
⦁ Antiseptic skin wipes (alcohol wipes are preferable)
⦁ IV cannula (in children over ten years old, the pink cannula is preferable as they are stiffer and longer)
⦁ Cannula adapter
⦁ Tourniquet
⦁ Gauze
⦁ Saline
⦁ Cannula dressing
⦁ Sharps bin
Free Download PDFs
View All

Step Four:
Flush the IV line with saline to check the patency of the cannula adapter
Step Five:
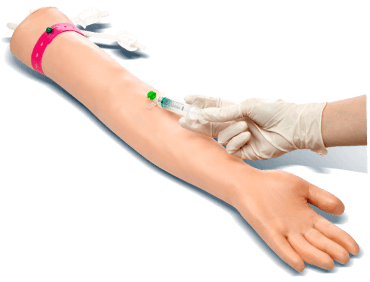
On the dorsum of the hand, place the tourniquet 5cm above the chosen site for IV access.
Step Six:
Identify a straight and superficial vein by looking and palpating. Ask the patient to repeatedly make a fist to make veins more prominent and tap on the area with the back of your hand. Take your time to identify a prominent vein.
Step Seven:
Give the site a firm rub with alcohol wipes for a good 30 seconds. The alcohol acts as a minor irritant which helps makes the veins more prominent, in addition to cleaning the area.
Step Eight:
Prepare the cannula by removing the cannula sheath and opening the cannula wings. Slide the needle gently out of the cannula and then place it back in to ensure that the cannula is working correctly.
Step Nine:
Hold the cannula in your dominant hand, between your dominant hand and third finger, while keeping the skin around the vein taut with your non-dominant hand. Warn the patient that they will feel a ‘sharp scratch’. Slowly insert the cannula from a 10-20 degrees approach until it enters a vein. The vein is usually more superficial than it may seem. You will know that you have entered a vein when you observe a ‘flashback’ – the cannula fills with a small amount of blood.
Step Ten:
Lower your hand to reduce the angle of the cannula and withdraw the needle until you see the second flashback of blood. Push the needle forward by around 3mm.
Step Eleven:
Release the tourniquet, then place the gauze under the cannula. Remove the needle and dispose safely into the sharps bin.
Step Twelve:
Attach the extender adapter onto the cannula
Step Thirteen:
Secure the cannula with the strips and the transparent cannula dressing.
Step Fourteen:
Flush the cannula device with sterile saline. Ensure the cannula stays clean via regular IV saline flushing.
Step Fifteen:
Regularly check the cannula for any signs of bruising or damage.
Mastering IV access can take time, so why not use on of our practice mannequin kits or IV access posters.